


Sensory calming rooms provide a controlled environment for people experiencing sensory overload. Their thoughtful designs and inclusive resources make them invaluable therapeutic hubs that can calm, centre, and regulate individuals who feel dysregulated or overstimulated.
A common, practical concern for parents, play specialists, and professionals is creating a layered sensory experience without overwhelming a room. We’re here to guide you, step by step, through the process of how to layer sensory experiences without overwhelming the room.
Where Can I Find Calming Sensory Rooms?
You can find calming sensory rooms in a wide range of public and private environments.
Schools use them as a key support for students who struggle in overstimulating classrooms. Calming rooms give students a space to regulate their senses and can also double as alternative learning environments for one-to-one nurture classes.
Sports stadiums, airports, and holiday villages also use quiet rooms as spaces for guests to relax away from busy, overwhelming areas, helping them navigate these areas safely. Making spaces once inaccessible accessible for everyone.
Discover our calming room case studies: www.rhinouk.com/case-studies/
How To Layer Sensory Experiences Without Overwhelming The Room
Layer One: Back To Basics
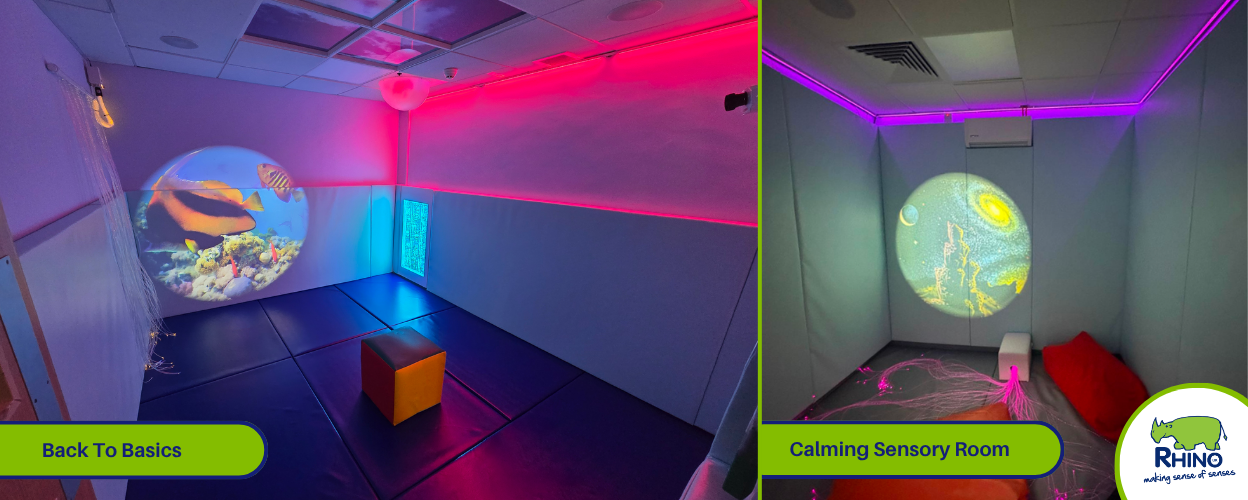
Think about the foundations of your room: the colours of the walls, the texture of the floor, the room’s lights, and windows. These elements are all key to creating a controlled sensory environment.
Walls
We’ve written before about which colours are best for sensory rooms, and we found that cool-toned and neutral colours are best for calming areas. They’re soft on the eye, reduce visual stimulation, and provide a blank canvas for sensory projection and light effects.
Floors
For floor textures, consider how the room will be used and who will be using it. If spills or accidents are likely, an easy-to-clean surface like laminate may be best. Or if you’d like something warmer, cosier, and softer to sit on, we’d recommend carpet.
Looking for the best of both worlds? Our safety padding provides a cosy, cushioned surface that’s also spill-proof and easy to clean. Our talented upholstery team makes all our padding in-house, so you can be sure you’re getting the best in safety and comfort.
Find out more: www.rhinouk.com/rooms/safety-wall-and-floor-padding/
Lights & Windows
If you’re looking to create a controlled sensory experience, it’s important not to let light overwhelm the space. We’d recommend using blackout curtains so you can fully control the room’s light levels.
Instead of central overhead lights, which can feel too bright and overwhelming, we love using LED Wall Wash to brighten a sensory space. It not only acts as colourful mood lighting, cycling through the colours of the rainbow, but you can also dim and brighten the lights, offering individuals a fully customisable/personalised experience.
Layer Two: Essential Sensory Resources
Once you’ve mapped out the basic room elements, it’s time to decide which sensory resources you’d like to include.
We find it best to start off simple with classic sensory room staples. They provide a strong sensory base that’s buildable, giving you the opportunity to introduce more resources over time once you’re more familiar with the sensory needs of the individuals using the room.
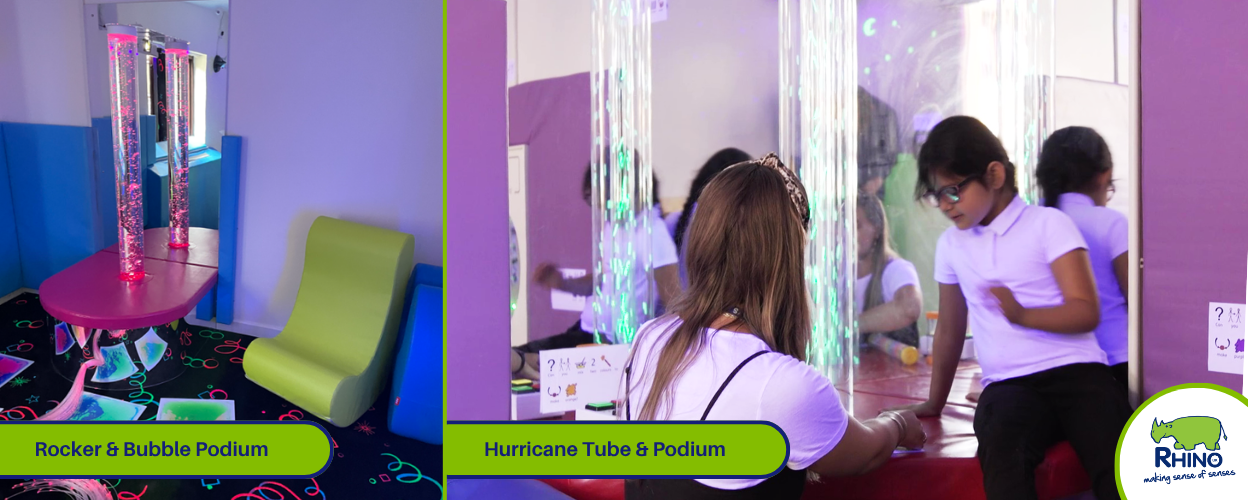
Classic sensory room items like a Bubble or Hurricane Tube with a mirror and podium will serve as the room’s main centrepiece, giving users a place to sit, relax, and watch the endlessly calming bubble effects.
Fibre Optics and Sensory Projector complement Bubble Tubes well. As they’re all light-based, they can be easily turned on/off or dimmed to meet an individual’s needs. They also reduce the risk of overstimulating someone who may be sensitive to touch, sound, or smell.
Alongside visual effects, we’d recommend introducing a soft seating element to the space, such as a Rocker Chair (which provides soothing vestibular input), a Beanbag (cosy and offering proprioceptive support), or a Bench Seat (for a new perspective or for lying down), as they give individuals a place to sit and centre themselves comfortably and cosily.
One or two seating options are best, as you don’t want to be overwhelmed with choice or take up too much floor space.
Layer Three: A Multilayered Experience
With your essentials selected, you can start thinking about your wider sensory experience.
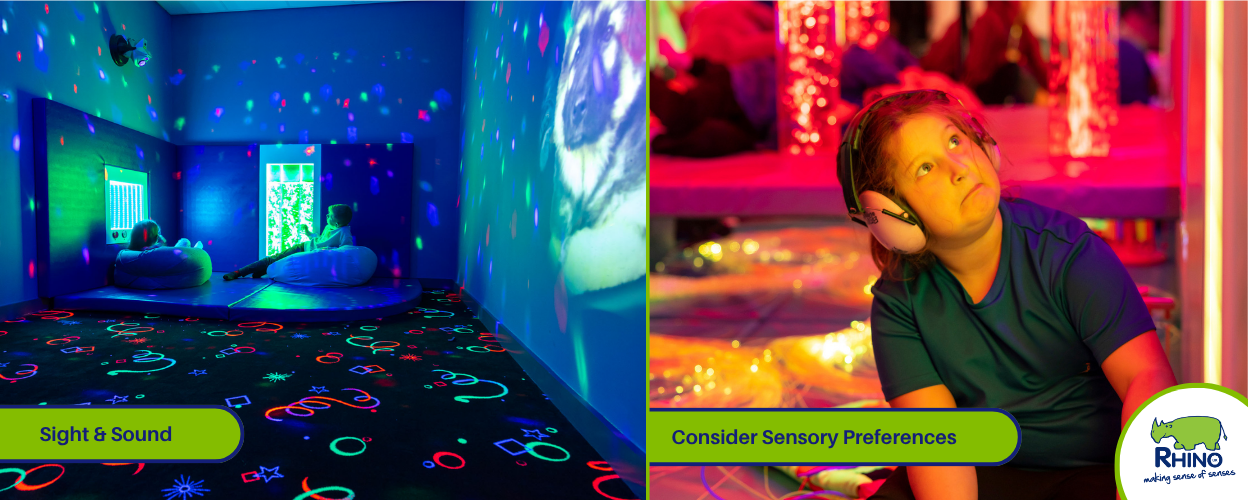
Always start with the individual. Think about their sensory preferences – whether they’re particularly calmed by tactile textures, or if they’re more receptive to vestibular stimulation – as this will guide you to find the best resources for your space.
Everything comes down to personal preference. And remember to introduce new sensory elements slowly so you don’t overwhelm a user.
Touch: Tactile resources are ideal for calming rooms as users need to actively seek them out, reducing the worry of overstimulation. You can keep things simple by adding a few soft cushions, or, if you need something more infection-control-friendly, you could try one of our tactile wall panels.
Smell: Sensory rooms should smell as neutral as possible, but if you find a user reacts well to specific scents, it can be worth introducing them to the space. Whether that’s more generally with a reed diffuser, or more actively with smell-based resources.
Sight: It can be easy to think more visual elements are the way to go, but we’d err on the side of caution. Too many visual resources could quickly become overwhelming. Instead, we recommend interactive visual resources, like our Deluxe Wall Panels, so users can immerse themselves in one highly engaging visual resource instead of being overwhelmed by many in the room.
Sound: Sound is another tricky sense to balance correctly. While whale sounds could be really relaxing for one person, they could be like nails on a chalkboard for someone else. Because of this, we’d keep sound-based resources to a minimum.
Either choosing ones that require input to create a noise (Acoustic Tactile Wall Set), so the user always remains in control. Or surround-sound room speakers that can connect to your phone or iPad to play users’ favourite music at a controlled sound level.
Practical Guide to Layered Sensory Experiences
When you’re in your calming room, it’s vital that you don’t turn all the equipment on at the same time, as this can be overwhelming. Turn on one resource at a time, then assess how the individual is responding to the new sensory input.
There’s no rush, and it’s important that you don’t overwhelm or overstimulate an individual’s senses.
Remember that every individual is unique and will have their own sensory preferences.
The more times you use the room and are familiar with the equipment, the better you’ll be able to tailor experiences.
Ready To Create Your Own Sensory Space?
Get in touch with our friendly sensory team today. They’ll talk you through our sensory room process, from design to installation, offering their expertise and the assurance that you’re creating the perfect sensory space.
Discover More
- Calming Sensory Resources:rhinouk.com/sensory/sensory-at-home/sensory-calming/
- Mental Health & Calming Rooms: rhinouk.com/blog/mental-health-and-calming-rooms/
- Calming & De-Escalation Sensory Rooms: rhinouk.com/rooms/de-escalation-rooms/


